Add Tenant L3Out
Configure L3Out
  • Introduction
  • Services as Code (SaC)
  • CXTM Basics
  • CXTM Projects
  • CXTM Test Cases
  • CXTM Test Automation
  • CXTM Batches
  • Setup GitLab CI/CD
  • Configure L3Out
  • Test Results
  • CXTM Reporting
  • Continue your Education

L3Out configuration

Now that you've added the cxtm stage to your pipeline, you'll add a tenant_l3out.nac.yaml configuration file to the data directory of your pipeline and push it to the repo, triggering the pipeline. The tenant_l3out.nac.yaml file will define the L3Out configuration for the ACI fabric, connecting to the external routers.

Step 1 - Create the tenant_l3out.nac.yaml file

From VS Code Server:

  1. Copy the below command in the VS Code Server terminal window to create the file.

  2. 
    code-server -r data/tenant_l3out.nac.yaml


  3. Copy the following code into your tenant_l3out.nac.yaml file.

  4. 
    ---
    
    apic:
      tenants:
        - name: pod07
          bridge_domains:
            - name: pod07-bd1
              vrf: pod07-vrf1
              l3outs:
                - pod07-l3out1
          l3outs:
            - name: pod07-l3out1
              vrf: pod07-vrf1
              domain: pod07-l3outdom
              node_profiles:
                - name: pod07-l3out-np
                  nodes:
                    - node_id: 1201
                      router_id: 172.16.107.201
                      router_id_as_loopback: true
                    - node_id: 1202
                      router_id: 172.16.107.202
                      router_id_as_loopback: true
                  interface_profiles:
                    - name: pod07-l3out-ip
                      interfaces:
                        - node_id: 1201
                          module: 1
                          port: 13
                          ip: 192.168.107.0/31
                          bgp_peers:
                            - ip: 192.168.107.1
                              remote_as: 65991
                              unicast_address_family: true
                              admin_state: true
                        - node_id: 1201
                          module: 1
                          port: 14
                          ip: 192.168.107.2/31
                          bgp_peers:
                            - ip: 192.168.107.3
                              remote_as: 65991
                              unicast_address_family: true
                              admin_state: true
                        - node_id: 1202
                          module: 1
                          port: 13
                          ip: 192.168.107.4/31
                          bgp_peers:
                            - ip: 192.168.107.5
                              remote_as: 65991
                              unicast_address_family: true
                              admin_state: true
                        - node_id: 1202
                          module: 1
                          port: 14
                          ip: 192.168.107.6/31
                          bgp_peers:
                            - ip: 192.168.107.7
                              remote_as: 65991
                              unicast_address_family: true
                              admin_state: true
              external_endpoint_groups:
                - name: pod07-ext-epg1
                  description: pod07-ext-epg1
                  subnets:
                    - prefix: 0.0.0.0/0
                  contracts:
                    consumers:
                      - pod07-contract1


  5. Press Ctrl + s to save the file tenant_l3out.nac.yaml file.
  6. Warning

    Be sure to save your file! Not saving will result in your code not executing.

Step 2 - Apply tenant L3Out configuraton

Now that you have created the tenant_l3out.nac.yaml file, you'll commit the changes to the GitLab repository. Upon commit, the pipeline will be automatically triggered to apply the L3Out configuration changes to the ACI fabric.

  1. Copy the below command in the VS Code Server terminal window to add the file.

  2. 
    git add data/tenant_l3out.nac.yaml


  3. Copy the below command in the VS Code Server terminal window to commit the file.

  4. 
    git commit -am "Added tenant L3Out configuraton file"


  5. Copy the below command in the VS Code Server terminal window to push the file.

  6. 
    git push


  7. Go back to the GitLab pipeline view to check on the status of the execution. The pipeline should successfully execute the CXTM stage after the original four stages of the pipeline.

Step 3 - Review the GitLab pipeline execution

The pipeline should successfully execute all five stages after the git push.

  1. Navigate back to your GitLab server


  2. Click on Build
  3. Click on Pipelines to view the pipeline execution


Alert

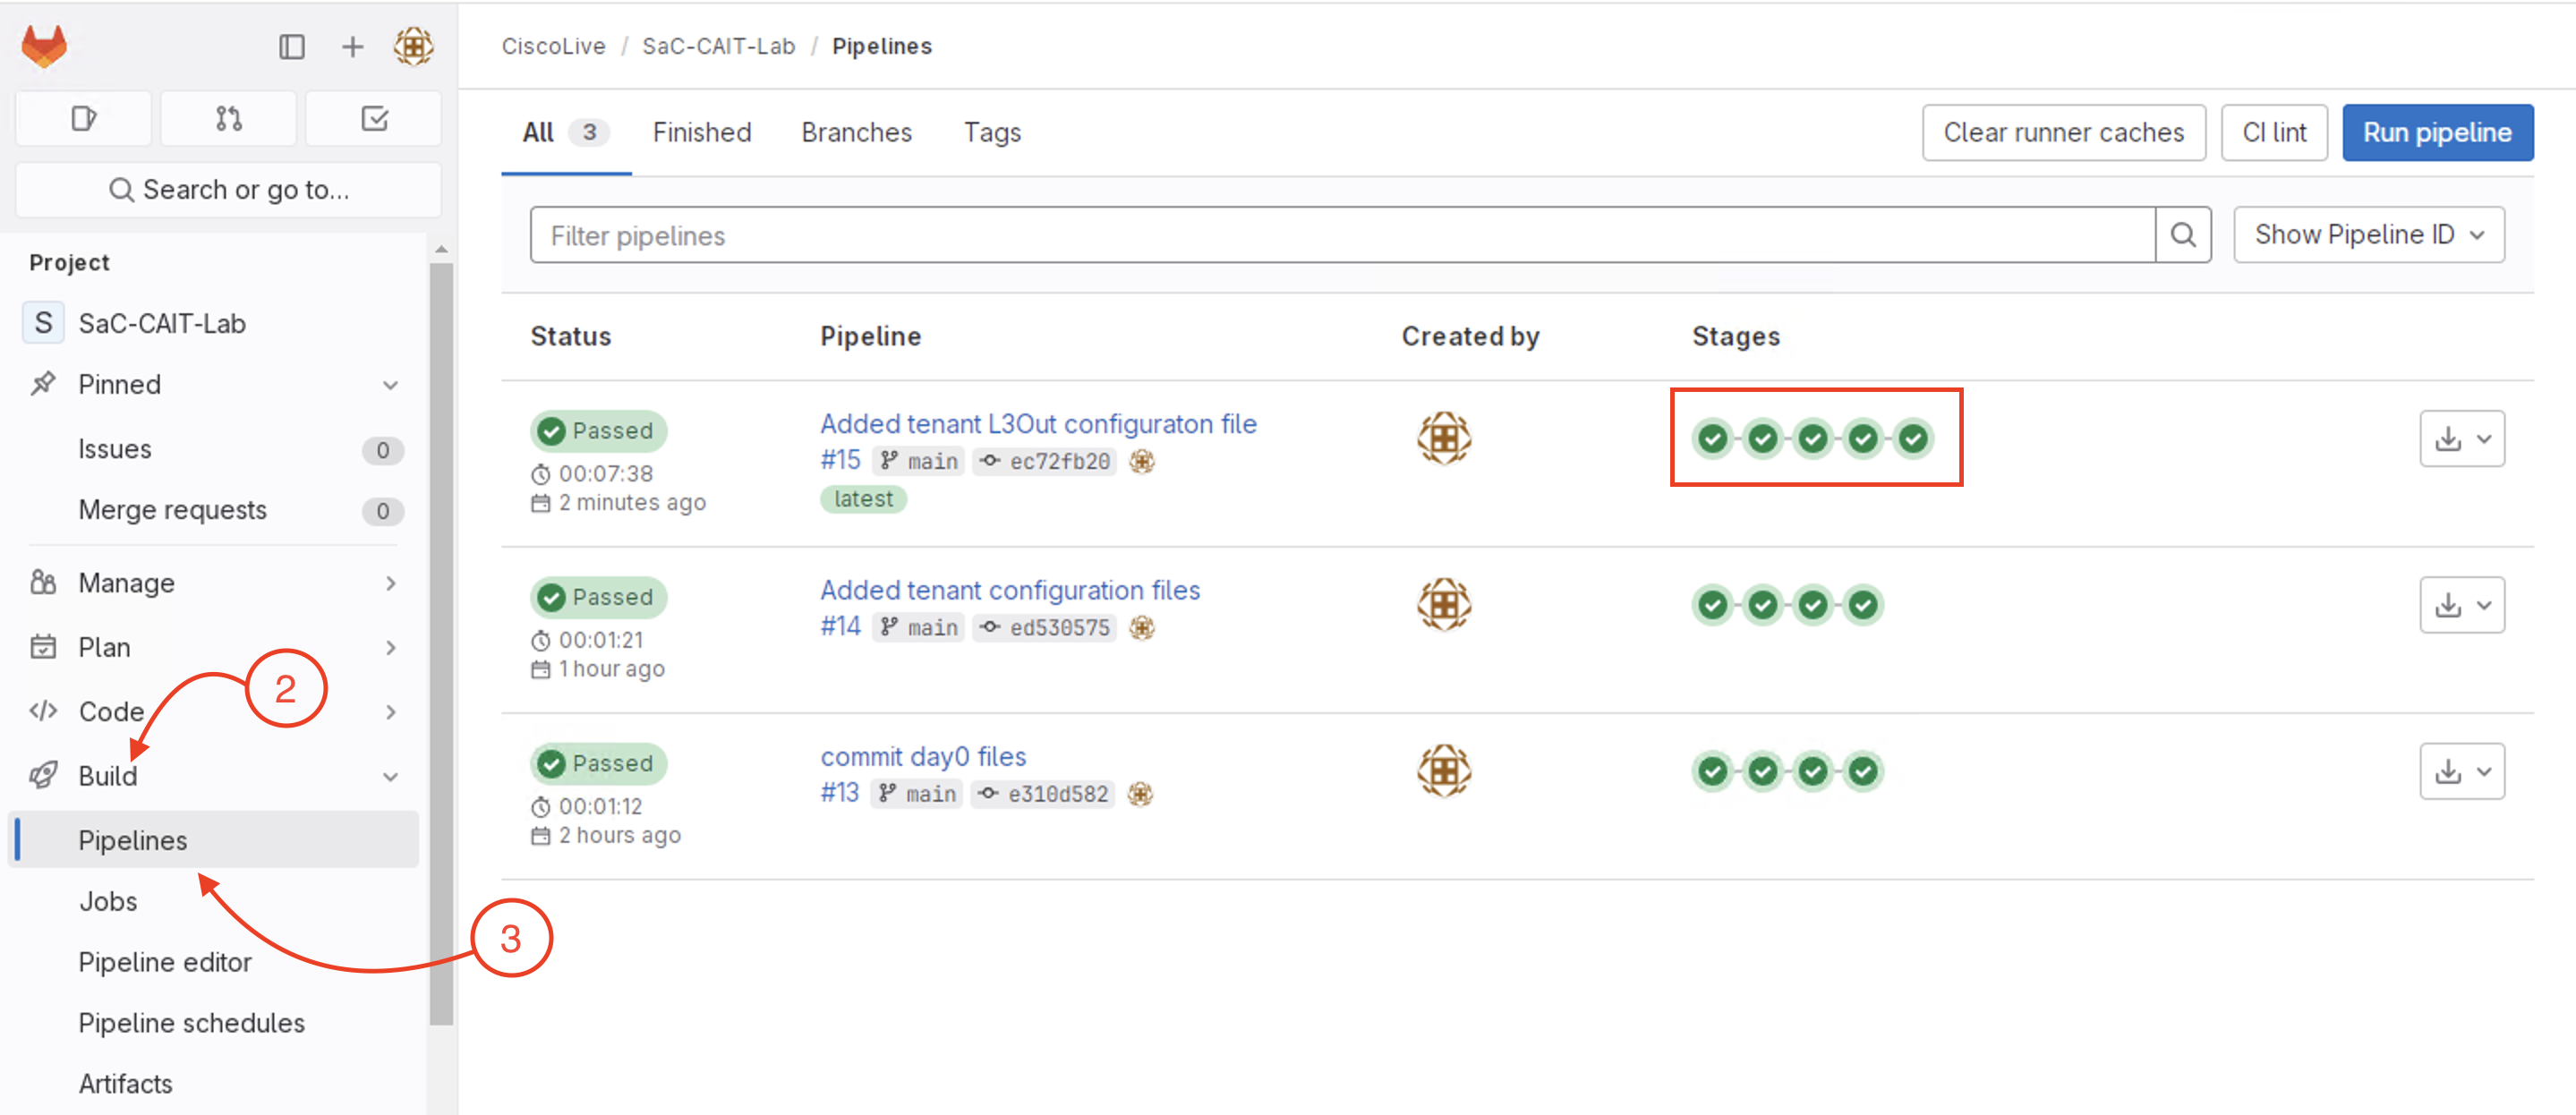
Notify your proctor if the pipeline failed before moving on.

Step 4 - Review the APIC for tenant L3out configuration

With the successfull completion of the pipeline execution, the tenant L3out configuration should be applied to the ACI fabric.

  1. Login back to the APIC and navigate to Tenants > ALL TENANTS to view your tenant " pod07. "
  2. Double click on your tenant " pod07 " and navigate to pod10 > Networking > L3Outs to view l3out tenant configurations.

Continue to the next section, to review the CXTM test results in more detail.